
craftsman snow thrower owner’s manual
Craftsman Snow Thrower Owners Manual: A Comprehensive Guide
Welcome! This detailed manual provides essential information for Craftsman snow thrower owners, covering operation, maintenance, and troubleshooting for optimal performance;

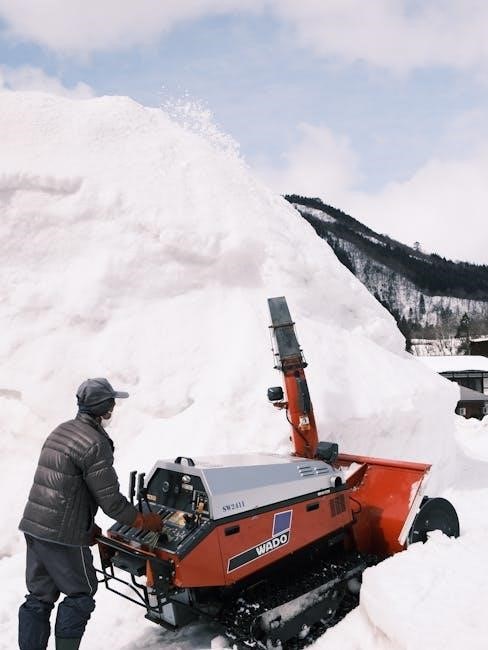
Congratulations on selecting a Craftsman snow thrower! This machine is designed for reliable and efficient snow removal, helping you reclaim your winter. Before operation, carefully review this owner’s manual to understand its features, capabilities, and safety guidelines. Familiarize yourself with all controls and components.
This guide details everything from initial setup and operation to routine maintenance and troubleshooting. Proper use and maintenance, as outlined here, will ensure years of dependable service. Remember to always prioritize safety and follow all provided warnings. Your Craftsman snow thrower is a powerful tool; understanding it fully is key to a safe and productive winter season.
Understanding Model Numbers and Serial Numbers
Locating your snow thrower’s model and serial number is crucial for accurate parts ordering, warranty claims, and accessing specific support information. The model number identifies the specific features and specifications of your unit. The serial number is a unique identifier for your individual machine, helpful for tracking service history.

Typically, these numbers are found on a decal affixed to the snow thrower’s frame, often near the engine or auger housing. Record both numbers in a safe place for future reference. When contacting customer support or ordering replacement parts, having these numbers readily available will expedite the process and ensure you receive the correct components for your Craftsman snow thrower.
Safety Precautions & Warnings
Operating a snow thrower involves inherent risks. Prioritize safety by thoroughly reading and understanding all warnings and instructions before use. Always wear appropriate safety gear, including eye protection, sturdy gloves, and non-slip footwear. Never allow children or untrained individuals to operate the machine.
Be mindful of your surroundings, ensuring no people or pets are within the throwing range. Never operate the snow thrower while under the influence of drugs or alcohol. Disconnect the spark plug wire before performing any maintenance or repairs. Regularly inspect the machine for worn or damaged parts, replacing them immediately.
General Safety Rules

Prioritize personal safety by maintaining a clear work area, free from obstructions. Never modify the snow thrower or disable safety devices. Keep hands and feet away from moving parts, especially the auger and impeller. Avoid operating on steep slopes, as loss of control can occur.
Always shut off the engine and wait for all moving parts to stop before clearing clogs or making adjustments. Be aware of potential hazards like hidden objects under the snow. Never leave the snow thrower running unattended. Follow all local regulations regarding snow removal.
Specific Snow Thrower Safety
Exercise extreme caution with the auger – never place hands or feet near it while the engine is running. Avoid throwing snow towards people, animals, or vehicles. Inspect the shear pins regularly and replace them with the correct type. Never attempt to adjust the deflector while the machine is operating.
Be mindful of carbon monoxide poisoning when operating a gas-powered snow thrower in enclosed spaces. Ensure adequate ventilation. Always use the provided extension cord if operating an electric model, and inspect it for damage before each use. Wear appropriate eye and hearing protection during operation.
Assembly Instructions
Before beginning assembly, carefully unpack all components and compare them against the parts checklist included in your owner’s manual. Ensure you have a clean, well-lit workspace. Familiarize yourself with each part before proceeding. The initial steps involve attaching the handle to the main snow thrower body, securing it with the provided bolts and washers.
Next, carefully install the auger assembly, ensuring it’s properly aligned and locked into place. Double-check all connections for tightness. Refer to the diagrams for correct orientation. Finally, attach any remaining components like the deflector and scraper bar, following the illustrated instructions.
Unboxing and Parts Checklist
Upon delivery, carefully inspect the shipping carton for any signs of damage. Once opened, thoroughly inventory all included parts against the detailed parts checklist provided within the manual. This checklist typically lists components like the engine, auger housing, handles, wheels, scraper bar, deflector, hardware (bolts, washers, nuts), and operator’s manual itself.
Verify that all listed items are present and undamaged. Note any discrepancies immediately and contact Craftsman customer support. Retain the packaging materials until assembly is complete and you’ve confirmed all parts are accounted for. A missing part can delay your first snowfall clearing!
Attaching Handles and Augers
Handle assembly usually involves securing the upper and lower handles to the snow thrower’s chassis using provided bolts and washers. Ensure a firm, stable connection, tightening all fasteners to the specified torque. Next, carefully attach the auger housing. Align the auger with the drive shaft and secure it with the designated hardware.
Important: Double-check that the auger rotates freely before proceeding. Improper auger installation can cause damage. Finally, install the scraper bar, ensuring it’s positioned correctly to effectively clean the surface. Refer to the diagrams in your manual for precise placement and fastening instructions.
Operating Your Snow Thrower
Before each use, inspect the snow thrower for any loose parts or damage. Ensure the area is clear of obstacles like rocks, toys, and pets. Familiarize yourself with all controls – chute rotation, speed settings, and the auger engagement lever.

Starting the engine requires following specific procedures for electric or gas models (detailed in the following section); Once running, gradually increase speed and adjust the chute direction to manage snow discharge effectively. Always operate the machine at a comfortable pace, avoiding sudden maneuvers. Prioritize safety and awareness of your surroundings.
Starting the Engine (Electric & Gas)
For electric start models, ensure the extension cord is properly grounded and rated for outdoor use. Plug it in, turn the key to the ‘on’ position, and press the start button. Gas-powered models require more steps. First, check the oil level and fuel tank. Engage the choke, set the throttle to start position, and pull the starter rope firmly until the engine ignites.
Gradually disengage the choke as the engine warms up. If the engine fails to start after several attempts, consult the troubleshooting section. Always disconnect the spark plug wire before performing any maintenance.

Adjusting Throwing Distance and Direction
To maximize throwing distance, ensure the snow thrower is operating at the correct speed and the discharge chute is clear of obstructions. The deflector controls the vertical angle of the snow stream; adjust it to suit your needs. For directional control, use the chute rotation lever. This allows you to aim the snow precisely where you want it.
Remember that heavier, wet snow will not travel as far as light, fluffy snow. Regularly check and adjust the chute cable for smooth operation. Avoid aiming the snow towards people, pets, or vehicles for safety.
Using Different Speed Settings
Craftsman snow throwers offer multiple speed settings to accommodate varying snow conditions and operator preferences. Lower speeds are ideal for light, fluffy snow or navigating tight spaces, providing greater control. Higher speeds are more effective for heavier, wet snow or clearing large areas quickly.
Utilize the speed control lever to select the appropriate setting. Remember that engaging the auger at a higher speed requires more physical effort. Always start with a lower speed and gradually increase it as needed. Be mindful of your surroundings and adjust the speed accordingly for safe operation.
Maintenance & Service
Regular maintenance is crucial for ensuring the longevity and optimal performance of your Craftsman snow thrower. Consistent servicing prevents costly repairs and extends the machine’s lifespan. This section details a recommended maintenance schedule, covering essential tasks like oil changes, spark plug replacements, and general inspections.
Prioritize safety by disconnecting the spark plug wire before performing any maintenance. Always refer to the specific maintenance intervals outlined in your model’s manual. Proper upkeep guarantees efficient snow removal and reliable operation season after season. Ignoring maintenance can void your warranty.
Regular Maintenance Schedule
Before each use, inspect the auger and scraper blade for wear or damage, ensuring they are securely fastened. Check oil levels and add if necessary, using the recommended grade specified in your owner’s manual. After every 5 hours of operation, clean the machine thoroughly, removing accumulated snow and debris.
Every 25 hours, inspect the drive belt for cracks or fraying. Annually, change the engine oil, replace the spark plug, and lubricate all moving parts. A consistent schedule maximizes performance and prevents unexpected breakdowns during critical winter months. Keep detailed records of all maintenance performed.
Oil Change Procedures
Warm up the engine for a few minutes to ensure the oil flows more freely. Locate the oil drain plug underneath the engine and position a suitable oil drain pan. Carefully remove the plug, allowing the old oil to drain completely. Once drained, replace the plug and tighten securely.
Next, remove the oil fill cap and add the recommended amount of fresh oil, as specified in your owner’s manual. Check the oil level with the dipstick, adding more if needed. Properly dispose of the used oil at a designated recycling center. Regular oil changes are crucial for engine longevity.
Spark Plug Replacement

First, disconnect the spark plug wire to prevent accidental starting. Locate the spark plug on the engine and use a spark plug socket to carefully remove it. Inspect the old spark plug for wear or fouling – a worn plug hinders performance. Gap the new spark plug according to the specifications in your owner’s manual; proper gapping is essential.
Then, thread the new spark plug into the engine by hand to avoid cross-threading. Tighten it securely with the spark plug socket. Reconnect the spark plug wire. Replacing the spark plug annually ensures reliable starting and optimal engine operation throughout the winter season.
Troubleshooting Common Issues
Encountering problems? This section addresses frequent issues. If the engine won’t start, check the fuel level, spark plug connection, and ensure the safety switch is engaged correctly. An auger that won’t engage often indicates a shear pin failure – replacement is necessary. For throwing issues or clogging, verify the discharge chute is clear and adjust the scraper bar for optimal snow contact.
Remember to consult the full manual for detailed diagnostics. Always disconnect the spark plug before performing any maintenance. Regularly inspecting and addressing these common problems will keep your Craftsman snow thrower running smoothly.
Engine Won’t Start
Facing a no-start situation? First, confirm sufficient fuel in the tank and that the fuel shut-off valve is open. Next, inspect the spark plug – ensure it’s clean, properly gapped, and securely connected. Check the safety interlock switches; they must be engaged for the engine to start. Verify the choke is positioned correctly (full choke for cold starts, none for warm).
If these steps don’t resolve the issue, examine the recoil starter for damage. A flooded engine may require repeated pulls with the throttle open. Consult the full manual for specific engine diagrams and troubleshooting flowcharts.
Auger Not Engaging
Experiencing an unresponsive auger? Initially, ensure the auger drive lever is fully engaged. Confirm the shear pins haven’t broken – these are designed to protect the gearbox from damage. Inspect the auger gearbox for any visible signs of damage or oil leaks. Verify there are no obstructions, like ice or dense snow, preventing rotation.
If the shear pins are broken, replace them with the correct type specified in the parts diagram. A jammed auger can sometimes be cleared by gently rocking the machine back and forth. Always disconnect the spark plug before attempting manual clearing.
Throwing Issues & Clogging
Reduced throwing distance or frequent clogging? First, check the discharge chute for ice or snow buildup – clear it completely. Ensure the scraper bar is properly adjusted and in good condition; a worn bar reduces throwing efficiency. Verify the auger is rotating at full speed. Wet, heavy snow is a common cause of clogging; try reducing the feeding rate.
If clogging persists, disconnect the spark plug and manually clear the auger housing and impeller. Avoid using sharp objects that could damage components. Consider using a snow thrower lubricant to reduce friction and improve snow flow.
Parts Diagrams & Replacement
Need to replace a worn part? Accessing detailed parts diagrams is crucial for successful repairs. Craftsman provides online resources, often through their website or dedicated parts portals, allowing you to visually identify components. Locate your snow thrower’s model number – it’s essential for finding the correct diagram.
Once you’ve identified the part, you can order replacements directly from Craftsman, authorized dealers, or reputable online parts retailers. Ensure the replacement part is specifically designed for your model. Keep a record of parts ordered and installation dates for future reference and warranty purposes.

Locating Parts Diagrams Online
Finding the correct parts diagram begins with your snow thrower’s model number, typically found on a sticker affixed to the machine’s frame. Visit the official Craftsman website and navigate to their parts lookup section; many models have interactive diagrams available. Alternatively, third-party parts retailers specializing in outdoor power equipment often host comprehensive diagram databases.
Search using your model number to filter results and display the corresponding exploded view. These diagrams clearly illustrate each component’s location and part number. Download or print the diagram for easy reference during repairs or maintenance. Remember to double-check the diagram matches your specific snow thrower configuration.
Ordering Replacement Parts
Once you’ve identified the necessary part number from the parts diagram, you can order replacements through several channels. The Craftsman website offers direct ordering, ensuring genuine parts. Authorized Craftsman dealers also stock a wide range of components and can provide expert assistance.
Numerous online retailers specialize in outdoor power equipment parts, often offering competitive pricing and fast shipping. When ordering, carefully verify the part number and compatibility with your snow thrower model. Consider purchasing from reputable suppliers to guarantee quality and avoid counterfeit parts. Keep your model and serial number handy for verification.
Storage & Off-Season Care
Proper storage is crucial for maintaining your Craftsman snow thrower’s longevity. Before long-term storage, thoroughly clean the machine, removing all snow and debris. Inspect for any damage and address it promptly. Stabilize the fuel to prevent deterioration during inactivity, or completely drain the fuel system as a safer alternative;
Store the snow thrower in a dry, protected area, such as a garage or shed. Cover it to shield it from dust and the elements. Disconnect the spark plug wire to prevent accidental starting. Regularly check the machine during storage for any signs of corrosion or pest infestation.
Preparing for Long-Term Storage
To ensure your Craftsman snow thrower remains in prime condition during off-season storage, meticulous preparation is key. Begin by running the engine briefly to circulate fuel stabilizer throughout the system, if opting not to drain. Thoroughly clean the exterior, removing all snow, ice, and accumulated debris to prevent corrosion.
Inspect all belts, augers, and moving parts for wear and tear, addressing any issues before storage. Disconnect the spark plug wire for safety. Store the unit in a dry, covered location, protecting it from the elements. Consider using a breathable cover to prevent moisture buildup and potential rust.
Fuel Stabilization & Drain Procedures
Proper fuel management is crucial for long-term storage. If choosing to leave fuel in the tank, add a fuel stabilizer according to the manufacturer’s instructions to prevent degradation and gum formation. Alternatively, completely drain the fuel tank and carburetor to avoid fuel-related issues during startup next season.
To drain, run the engine until it stalls from fuel starvation after closing the fuel shut-off valve. Dispose of the drained fuel responsibly, following local regulations. Inspect the fuel lines for cracks or leaks and replace as needed. A clean fuel system ensures reliable performance when you need it most.